Delivery distances, drive times, address suggestions and the route map all come from Google. Google wants a billing account and two keys: one the server uses, one the browser uses. This is the walkthrough people find most confusing, so it is the most detailed.
What it is
Google Cloud is Google's business side. A "project" is a folder for your keys and your bill. You will use four of its maps services: Geocoding (an address to a pin), Places (address suggestions as you type), Routes (drive times) and Maps JavaScript (the map on screen).
Cost
Google gives each maps service a free allowance every month that a rental company's normal use stays inside (thousands of lookups). Past that it is cents per lookup. The app also caches drive times so the same road is not paid for twice. Set the budget alert in step 15 and you will never be surprised.
Time
About 30 minutes. If this is your first Google Cloud account, Google may hold billing for a day for a check.
You will write down
Two keys, both starting with AIza: the server key (goes in the app) and the browser key (goes in Netlify).
Part A: the account, the project, billing
Open console.cloud.google.com and sign in with a Google account that belongs to the business. If you only have a personal one, make a Google account for the company email first.
Accept the terms. If a "Try for free" box appears, you can take it; the credit is Google's, not a commitment.
At the top of the page there is a project picker (it may say My First Project). Press it, then New project. Name: CRM maps. Press Create, wait for the notification, then pick the new project in the picker so the top bar shows its name.
In the left menu press Billing. Press Link a billing account, then Create billing account. Enter the company name, address and a card. Google charges nothing until you go past the free allowance.
Part B: switch on the four services
In the left menu press APIs & Services, then Library.
Search Geocoding API, open it, press Enable.
Back to the Library. Search Places API (New): it must be the one with "(New)" in the name. Enable it.
Back to the Library. Search Routes API. Enable it.
Back to the Library. Search Maps JavaScript API. Enable it.
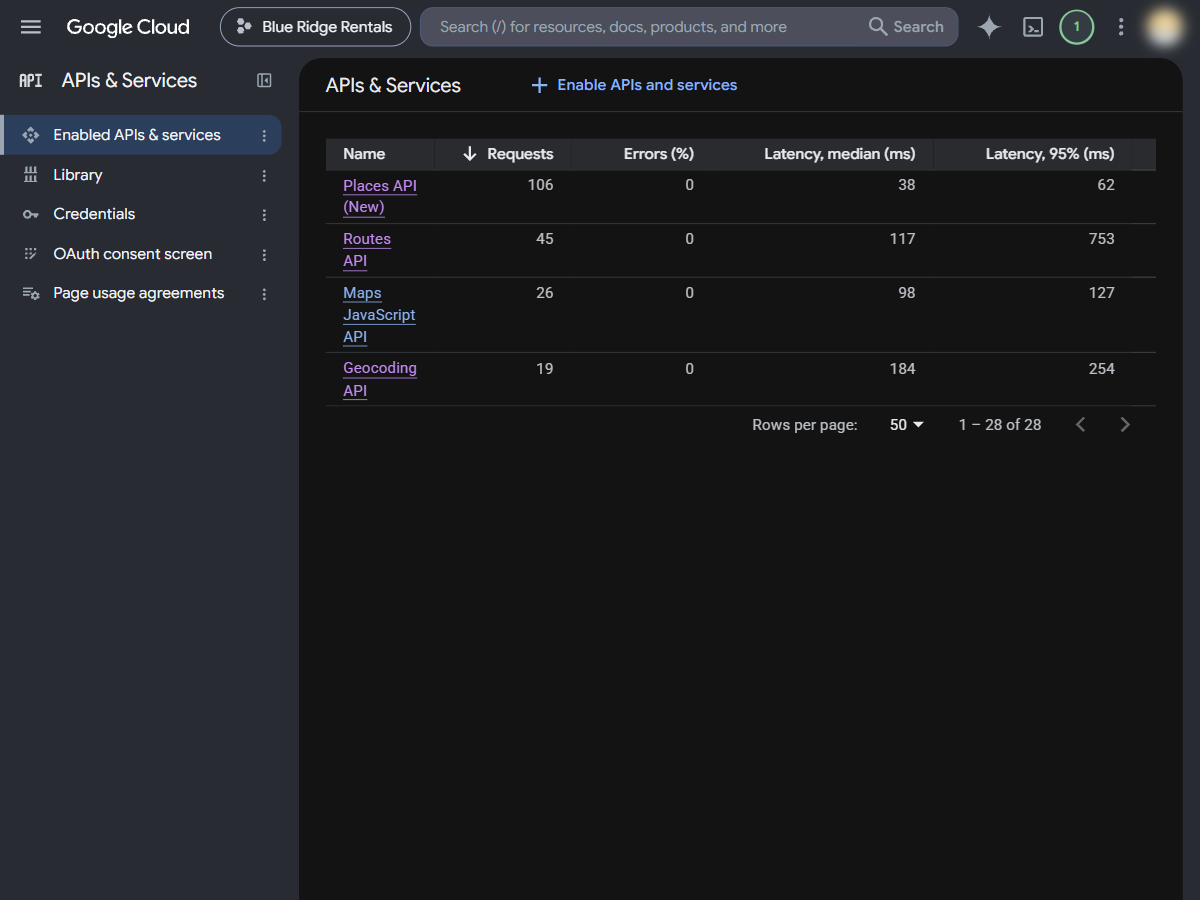
APIs & Services, Enabled APIs & services, when all four are on.
Part C: the server key
Press APIs & Services, then Credentials, then Create credentials, then API key. A box shows the new key. Press Edit API key (or the pencil beside it in the list).
Name: CRM server key.
Under Application restrictions leave None. This key is used by your server, which has no fixed website address, so a website restriction would block it.
Under API restrictions choose Restrict key and tick exactly three: Geocoding API, Places API (New), Routes API. Press Save.
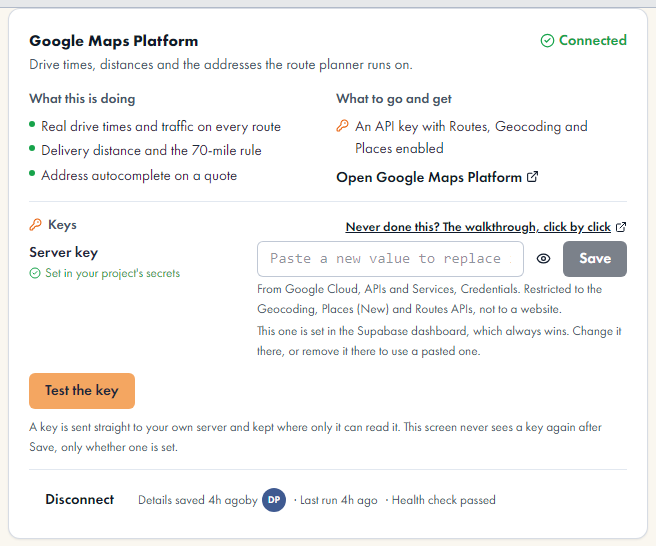
Press Show key, copy it. In the app open Settings, System, Connections, Services, the Google Maps line, paste it in the Server key box and press Save, then Test the key. It should answer that Google accepted an address lookup.
The Google Maps card in the app. The server key goes in the box; Test the key asks Google whether it works.
Part D: the browser key
Create credentials, API key again. Edit it. Name: CRM browser key.
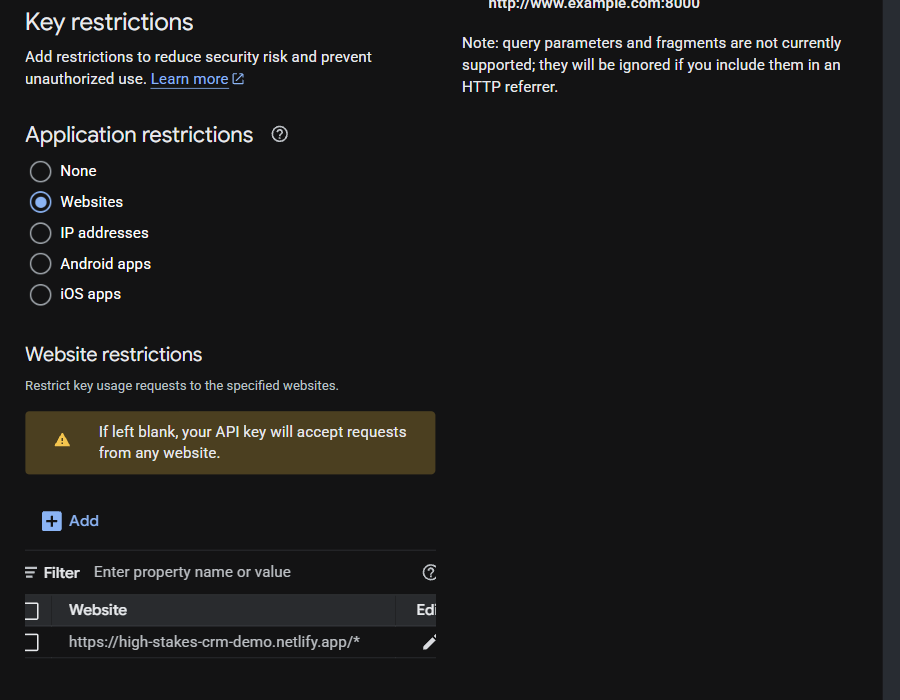
Under Application restrictions choose Websites, press Add, and enter your app's address followed by /*, for example https://blueridge-crm.netlify.app/*. Add your own domain the same way if you set one. This stops anyone else using your key on their site.
Under API restrictions choose Restrict key and tick one: Maps JavaScript API. Save.
Copy the key. In Netlify open your site, Site configuration, Environment variables, Add a variable: key VITE_GOOGLE_MAPS_BROWSER_KEY, value the key. Do not tick "secret": the build has to read it. Then Deploys, Trigger deploy. When the deploy finishes, open the app, Dispatch, Routes: the map draws.
The browser key with Websites chosen and the app address added. Everything else on the page can stay as it is.
Part E: a limit and an alert, so a mistake cannot cost money
Press APIs & Services, Enabled APIs, open Geocoding API, then the Quotas tab. Find Requests per day, press the pencil, and set it to 2,000. Do the same for Places API (New) and Routes API. The app will tell you if a day ever hits the cap, and it falls back to straight-line estimates rather than stopping.
Press Billing, then Budgets & alerts, then Create budget. Name: Maps. Amount: $50 a month. Leave the alerts at 50, 90 and 100 percent. Press Finish. Google emails you if spend heads that way.
Done when: Test the key passes, the Routes map draws, and the budget exists.