Supabase
Supabase is where your data lives: a real Postgres database in an account in your name, plus the logins and the small server programs the app uses. This is the longest walkthrough and the one that matters most.
- What it is
- A hosted database company. You get a database, a login system, file storage and a place to run small server programs, all in one project.
- Cost
- Pro is required: $25 a month at the time of writing. It keeps a backup of your data every day for 7 days, never pauses, and holds 8 GB, room for years of orders and email. The free plan has no backups, so it is not supported.
- Time
- About 40 minutes, in four parts: the account and project, the database, the server programs, the first login.
- You will write down
- The project address (looks like https://abcdefgh.supabase.co), the publishable key, and the database password you choose. Keep them somewhere safe; the Netlify walkthrough needs the first two.
Part A: the account and the project
- Open supabase.com and press Start your project. Sign up with your company email (not GitHub) so the account belongs to the business.
- Confirm the email Supabase sends you, then sign in.
- You land on a page asking for an organization. Give it your company name, choose Personal or Company as it fits, and the Free plan for now. Press Create organization.
- Press New project. Name: your company name. Database password: press Generate a password, then copy it somewhere safe before going on. You will rarely need it, but it cannot be read back later. Region: the one nearest your warehouse (East US for the eastern states). Press Create new project.
- Wait two or three minutes while the green bar fills. When the page shows a dashboard with a left-hand menu, the project exists.
- In the left menu press Project Settings (the gear at the bottom), then API. Copy the Project URL and the publishable key (the long one under Project API keys that is safe to use in a browser) into your notes. If the page shows an "anon" key instead, that is the same thing under its older name.
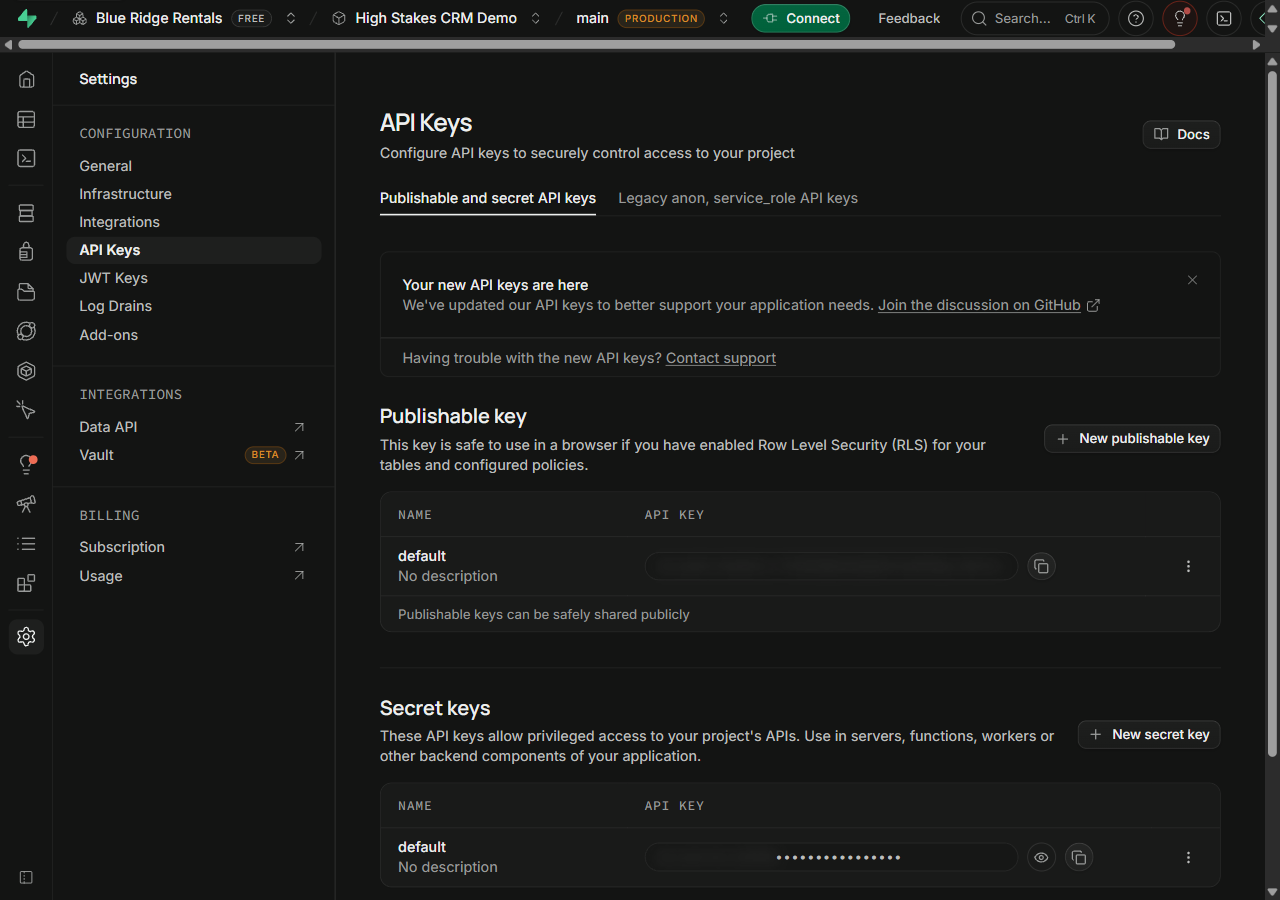
Do not copy the service role or secret key anywhere. The app never needs it in your hands; the server programs read it on their own.
Part B: the database
The whole database is written in one file, the baseline, and the starting data in a second. You paste them into Supabase. The file is big, so it comes cut into numbered parts, each a whole piece that runs on its own.
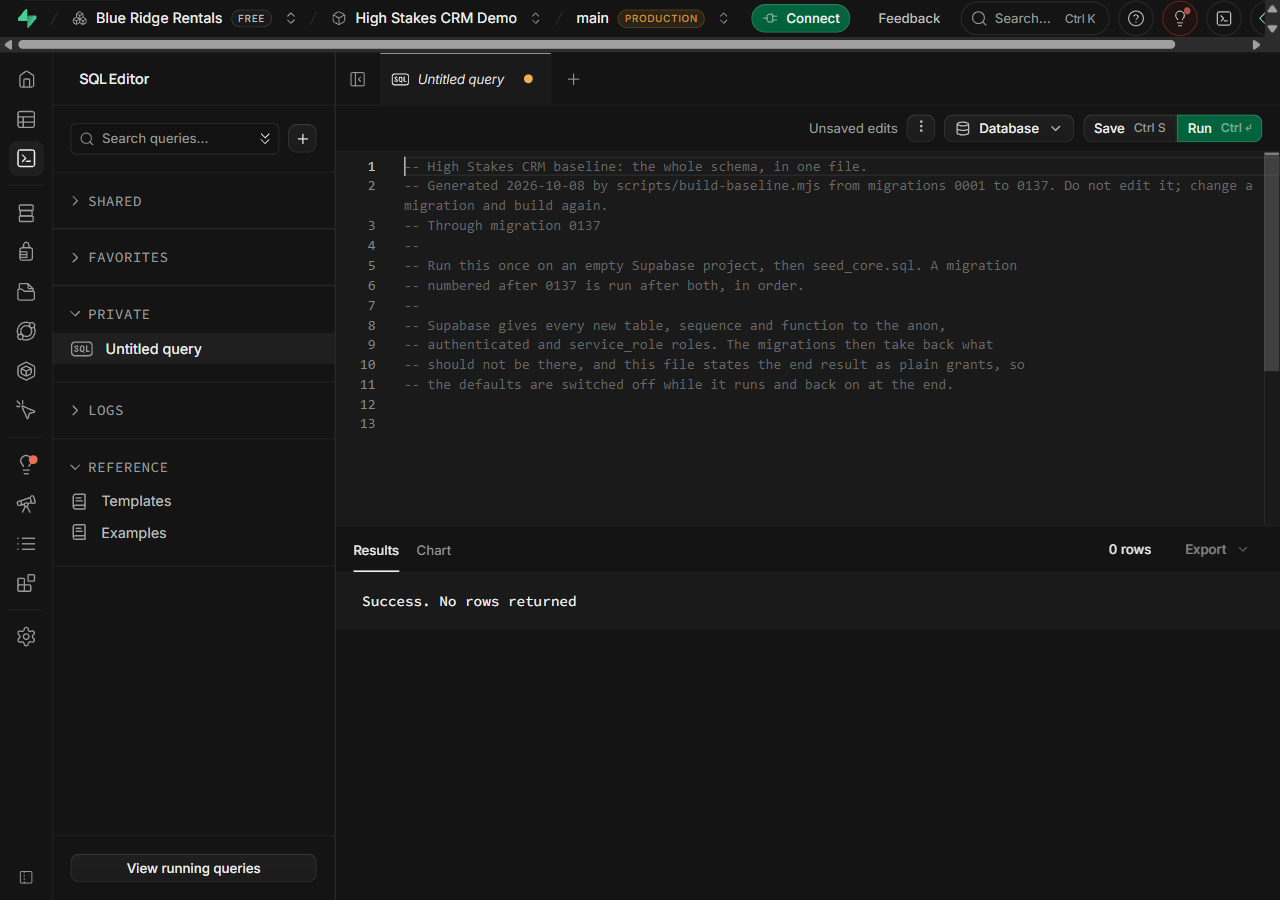
- In the left menu press SQL Editor. Press New query (or the plus) so you have an empty page.
- Open the file high-stakes-baseline-1.sql from the install folder (downloaded from the guide's front page with your license ID, then unzipped), select all of it (Ctrl+A), copy, and paste it into the empty query page.
- Press Run (or Ctrl+Enter). Wait for "Success" at the bottom. It can take up to a minute. If it says an error, do not go on: copy the message and write to us with the part number.
- Clear the page (Ctrl+A, Delete) and do the same with high-stakes-baseline-2.sql, then each part in order until the last. The order matters; the number is in the file name.
- Then paste and run seed_core.sql. This is the starting data: the modules, the roles, the permission matrix, the message templates. No company data; that is yours to enter.
- If READ-ME-FIRST.txt names a file like 0151_something.sql to run after the seed, run it now. Skip the migrations folder: the baseline already holds everything in it. That folder is for updates later (the Updates section of the guide's front page).
- To check: in the left menu press Table Editor. You should see a long list of tables (quotes, orders, products, vehicles and many more). If the list is empty, a part did not run.
Part C: the server programs
Maps lookups, texts, card payments and emails run as small programs on Supabase called edge functions. There are about thirty and they are deployed with one typed command. This is the one step in the whole setup that uses a command line; it takes five minutes.
- Install Node.js from nodejs.org (the LTS download; accept every default). It gives your computer the
npxcommand. - Open the install folder (the unzipped one, with READ-ME-FIRST.txt and a folder called supabase in it). On Windows, click in the folder's address bar, type
cmdand press Enter; a black window opens in that folder. On a Mac, open Terminal and typecdthen drag the folder into the window and press Enter. - Type
npx supabase loginand press Enter. If it asks "Need to install the following packages", typeyand press Enter. A browser tab opens asking you to sign in to Supabase and approve; press Authorize. The window says you are logged in. - Back in Supabase, open Project Settings, General and copy the Reference ID (twenty lowercase letters).
- Type
npx supabase functions deploy --project-reffollowed by that reference ID, and press Enter. Lines scroll past for a few minutes, one per program, each ending in "Deployed". The last line says it is done. - Still in the window, type
npx supabase secrets set --project-ref+ the reference ID +PUBLIC_URL=https://yourcompany.netlify.app APP_NAME="Your Company CRM", with your own site address (you choose it in the Netlify walkthrough; come back and run this once you know it). This tells the programs what to call the app in texts and where its links point.
Every other key (maps, texting, payments, email) is pasted inside the app, not typed here.
Part D: sign-ups off, then the first login
Do this part before the app goes online. Nobody should ever be able to sign themselves up: everyone gets in by an invite you send from inside the app, and the first login, yours, is made here.
- In the left menu press Authentication, then Sign In / Providers. Under User Signups, switch Allow new users to sign up off and save. (The typed install,
npm run setup, does this for you.) - Still under Authentication, press Attack Protection and switch Prevent use of leaked passwords on. A password already in a public breach is then refused.
- Press URL Configuration: set Site URL to your app's address (you choose it in the Netlify walkthrough) and add the same address with /set-password on the end under Redirect URLs. This is where invite and password emails send people.
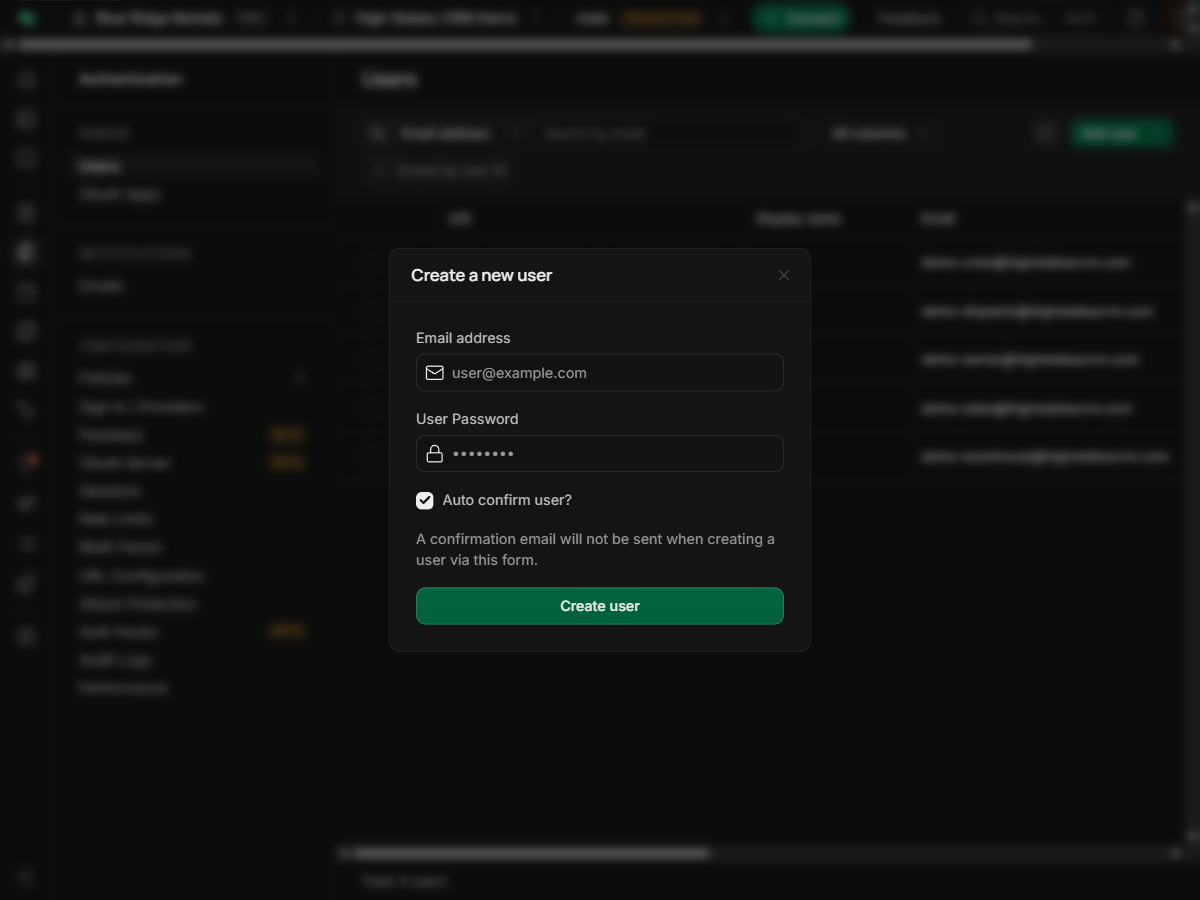
- Press Users, then Add user, then Create new user. Enter your own email and a password you choose. Tick Auto Confirm User so no confirmation email is needed. Press Create user.
- Back in the SQL Editor, run this one line with your own email in it:
select public.claim_first_admin('you@yourcompany.com');It answers with your name and "is the admin". A login made in the dashboard starts switched off, like any login that was not invited; this line is what makes the first one the admin. It works once: with an admin in place it does nothing and says so. - Everyone after you is invited from inside the app (Team & Roles) with the role you choose. The last step of the setup guide inside the app asks you to confirm the three settings above.
Done when: Table Editor lists the tables, the deploy command ended with every program deployed, sign-ups are off, and the SQL editor answered that you are the admin.